

Preamble
A few years ago now, I wrote a guide on installing PCem and Windows 95. While people still seem to be getting use out of it, it’s a bit out of date with the current version of PCem making things confusing for some people, while quite a few other things have changed since. With Sarah Walker leaving the project, development of PCem seems to have effectively stopped, while the development of 86box, a fork of PCem, has continued at a strong pace. 86box offers even more machine configurations, improved accuracy and has some nice quality of life features to make things easier too.
The improved accuracy also demands higher system requirements for full speed emulation, so it should be noted if you already struggle to run PCem on your system, 86box may not be a good option for you and continuing to stick with PCem is likely a better choice for those with older/weaker host machines.
I’ll be using Windows 98 for this guide because it’s a little easier to setup than 95, with better driver support, plus it’s faster and more efficient with better access to the internet. If you prefer Windows 95, once you’ve followed the emulator setup section of this guide, you can refer to my previous guide for help on installing that.
Supplemental information can be found on the 86box wiki. Make sure you have a look through it, there’s lots of good info within.

Emulator Setup
Grab the emulator here:
https://86box.net/
I recommend downloading the stable version, the majority of people will want to grab the 64-bit Windows build. At the time of writing this is:
86Box-Windows-64-b5000.zip
You will also need the archive of roms, available on the release page here:
https://github.com/86Box/roms
If you want to use different emulated machine configurations 86box does not have a system for that built in, but there are third party managers for this:
https://github.com/86Box/86BoxManager
Here’s what you should have downloaded:
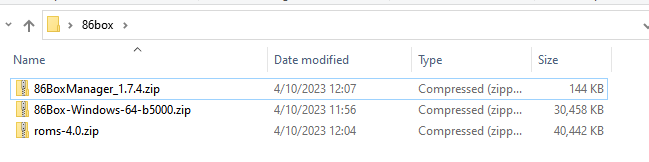
Extract 86box and 86box manager into the same folder, then create a folder labeled “roms”
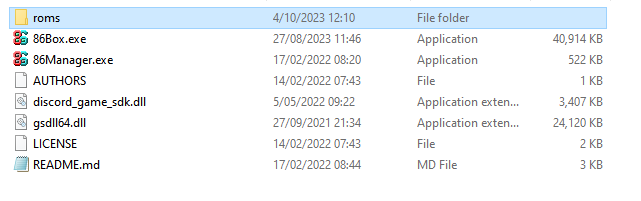
Within the roms archive we downloaded, a couple of subfolders deep contains the stuff we need to put into our newly created “roms” folder.

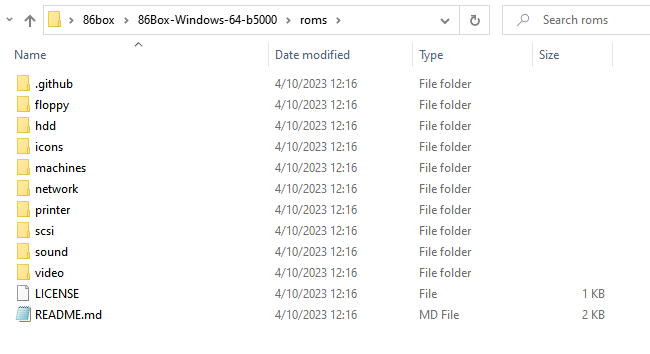
Throw those in here like so. Your roms folder should now look like this.
You will also want to create a folder to contain the configuration and hard disk image files for your virtual machines. This can be in your 86box folder or somewhere else where you have more space. It’s up to you. I’m just going to make a “VM” folder in my 86box folder.
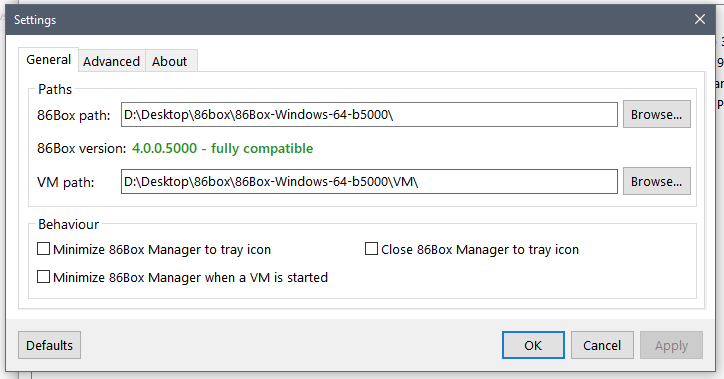
Run 86boxmanager and click on settings and tell it where your 86box folder and virtual machine folders are and click OK.
Now click the Add button, give your new machine a name and a description if you like and click Add.

Select the new machine and click the configure button.
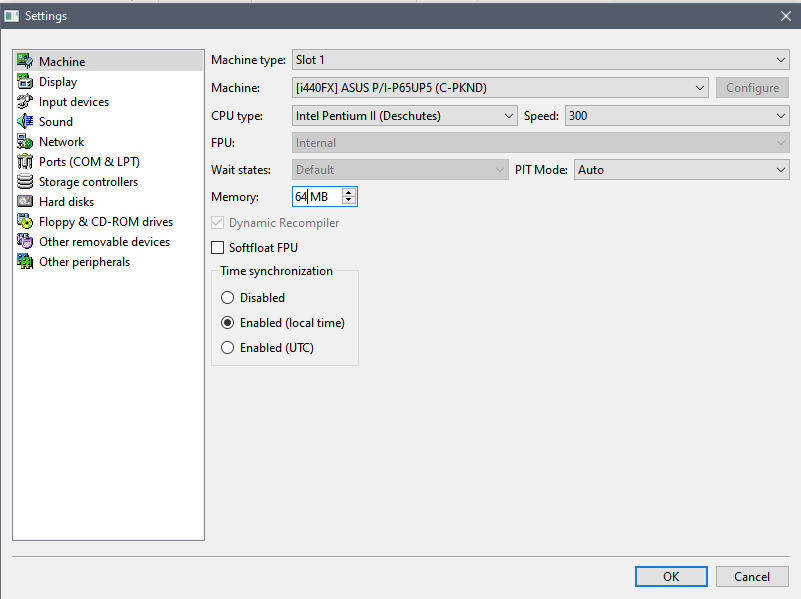
We are going to be making a Slot 1, Pentium II machine with a Voodoo3, the envy of many computer nerds in the late 90s. The board we’ll be using can also support slower Pentium 1 CPUs that you can use if your host machine isn’t up to the task of emulating a faster Pentium II.
On the first page, set it up like this:
On the display tab, change the video card to Voodoo 3 3000. Many components have additional settings that you can change. The Configure button will become available if they do.
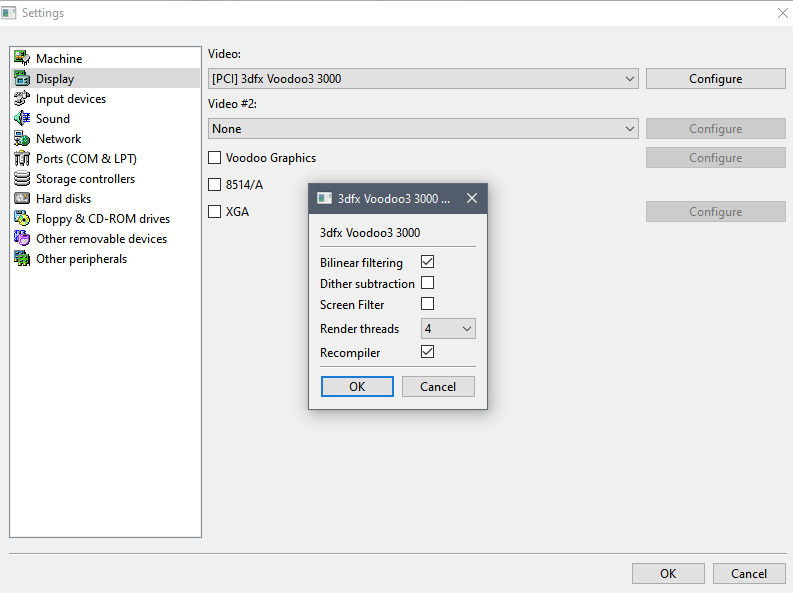
The configuration options are mostly up to your preference. Bilinear filtering smooths out textures, dither subtraction will reduce the voodoo’s trademark dithering pattern, screen filter tries to emulate the look of the analog video signal. If your host machine’s CPU doesn’t have a lot of threads, you might find it beneficial to reduce the number of render threads. In my experience the screen filter adds a lot of overhead to the GPU emulation and can cause noticeable slowdown so I don’t recommend turning it on. The settings I use in the screenshot are what I recommend.
Leave recompiler checked for better emulation speed.
Input devices:
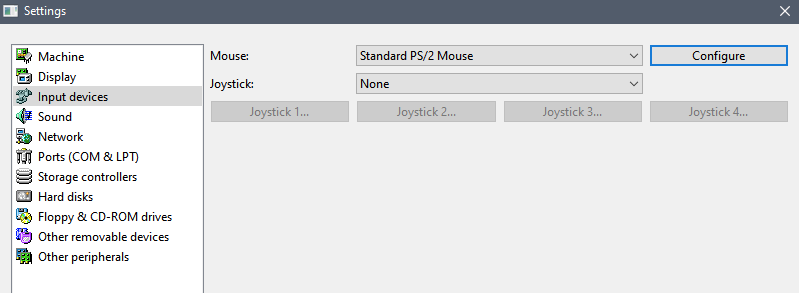
Standard PS/2 mouse for input. Leave it on 2 buttons so that you can use your middle mouse button to uncapture the mouse from the emulator. If you want to emulate a 3 button mouse you will need to use a key combination to do this which is a little more annoying (F8 + F12).
(Later edit: I’ve since discovered that the Microsoft Bus Mouse (In Port) option is very smooth and low latency. It may not be compatible with every configuration but it’s worth giving it a try. Just make sure to set it to an IRQ that isn’t being used by the soundcard or something. You can ignore this for now and carry on with the PS/2 mouse if you find what I just said confusing, you can always try it later when you have everything else set up.)
Sound setup:
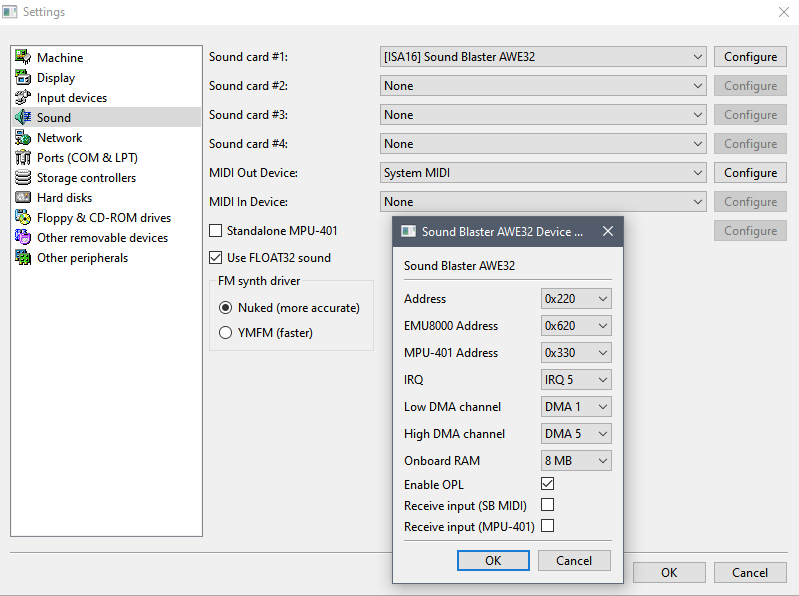
I have Virtualmidisynth installed on my host machine, which is why I have MIDI Out Device set to “System MIDI” If you don’t, leave this set to none, though everything should still work either way.
Network:
If you want to muck around with the internet at some point you can add a network card here. I’ve found the Realtek card to be easiest to get working. Just note you will need to set the mode to SLiRP for it to actually work.

You can ignore the Ports and Storage Controller tabs for the machine we are setting up.
Hard disks:
On the Hard disks tab, hit the New button.
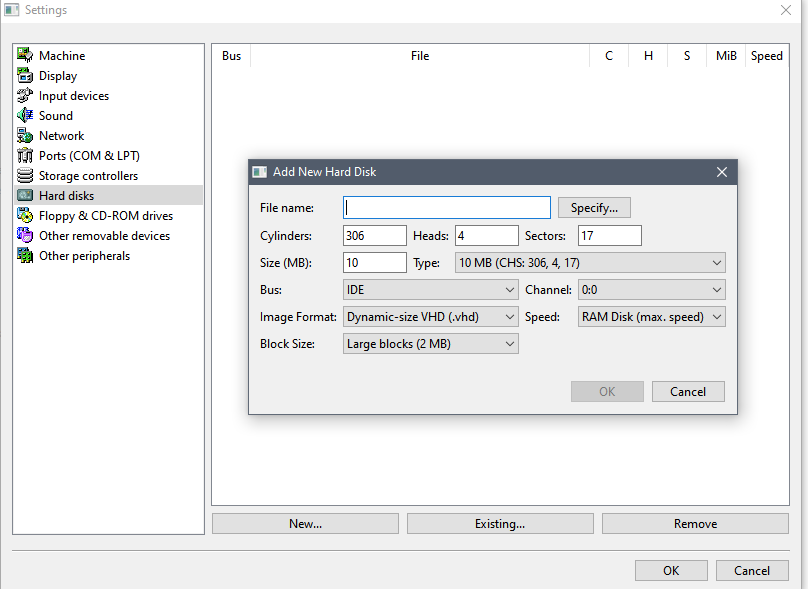
Give it a name, and Size. The other values will sort themselves out for you. I’m creating a 10GB drive here.
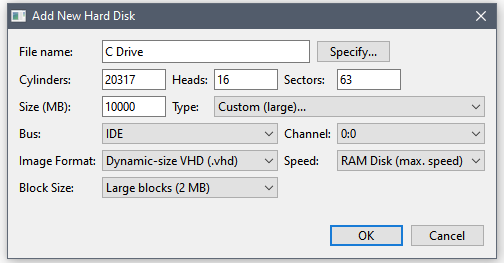
Hit OK. Leave it on RAM Disk speed for now, it will make formatting much faster. The disk image file (VHD) will automatically be created inside your VM folder, within an additional sub-folder for this machine.
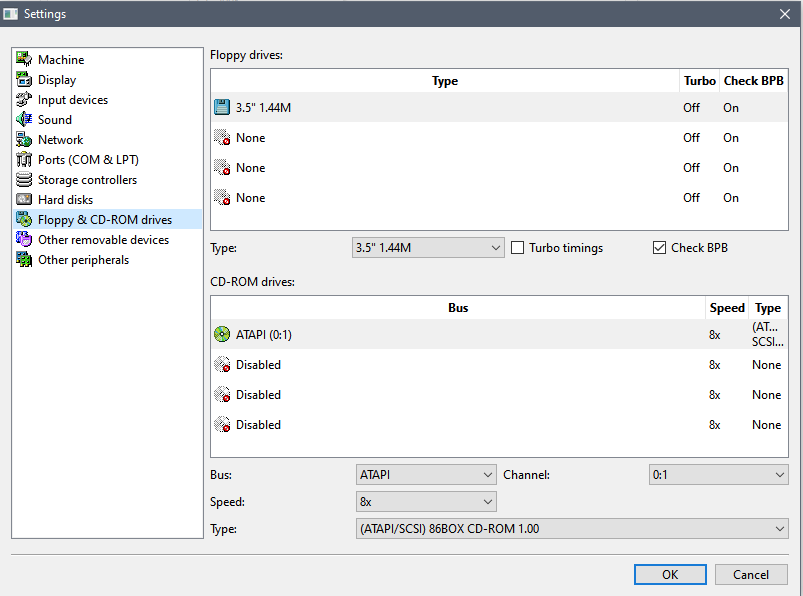
In Floppy & CD-ROM drives, let’s remove the second floppy disk drive:
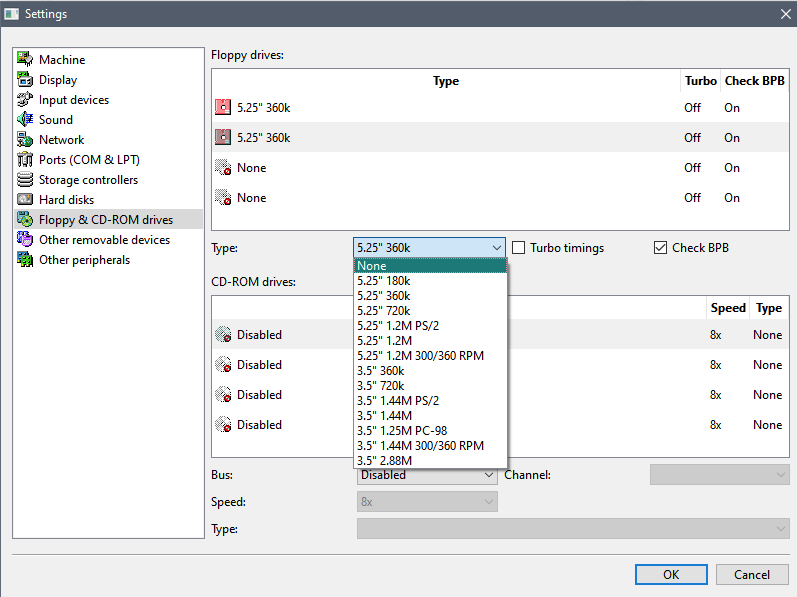
and change the first floppy drive to a 3.5″ 1.44mb drive.
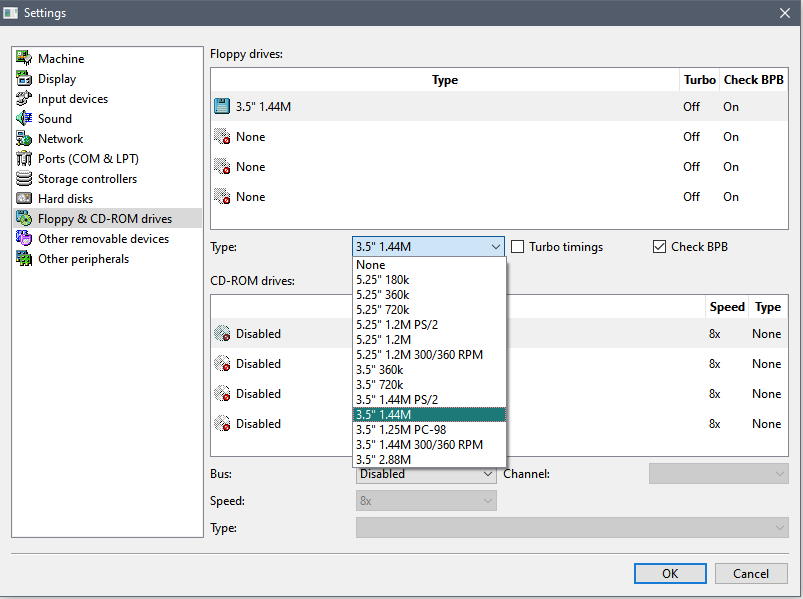
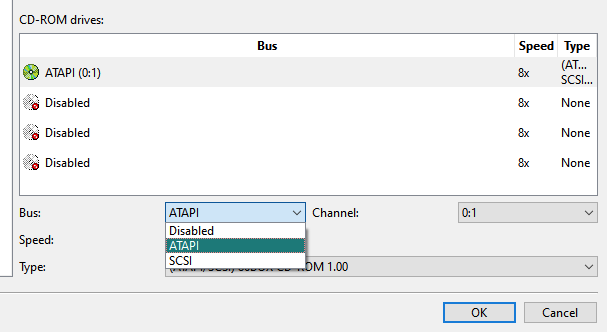
And add an ATAPI CD-ROM drive.
And we’re done on the machine setup. Hit the OK button.
You can now hit that Start button to turn on the emulated computer.

Setting Up The System
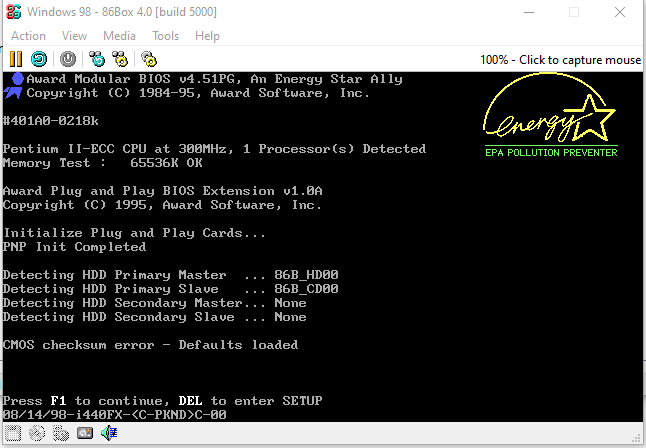
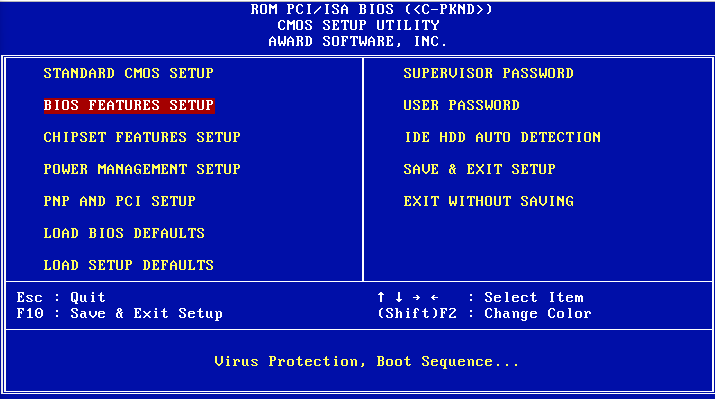
You should be presented with this screen. Hit the Delete key to enter the BIOS setup.
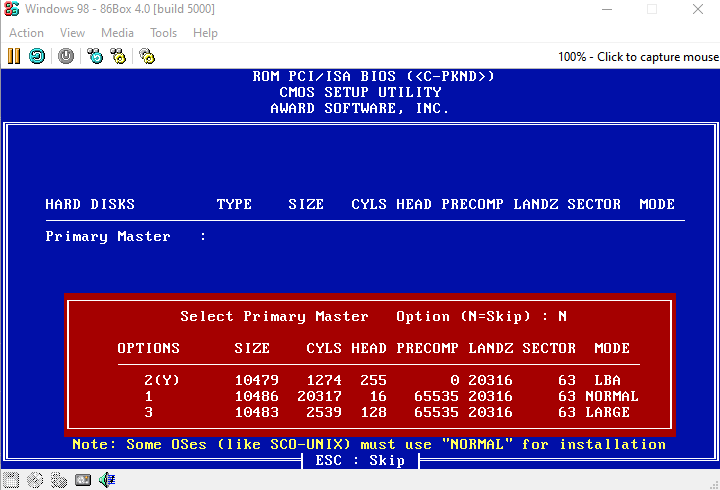
Select IDE HDD AUTO DETECTION
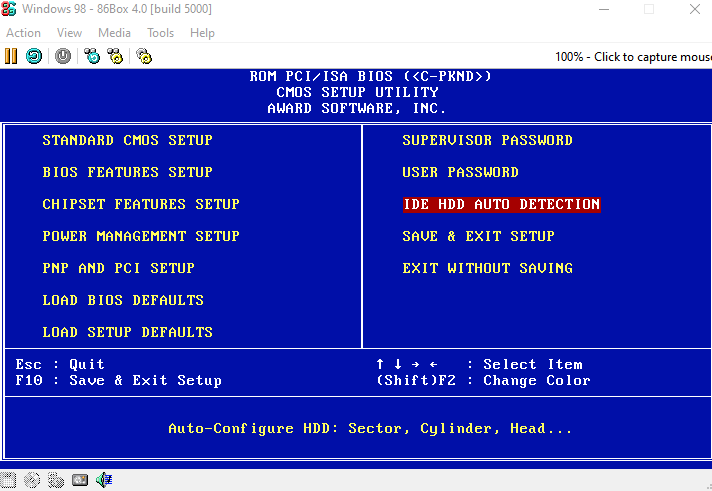
Hit the Y key to select the default option (2) and then press enter.
We haven’t set up any additional disk drives so you can just tap escape until you’re dumped back to the main page.
Now we are going to need a boot disk and a Windows 98 CD.
Windows 95 boot disk (it works fine for setting up Win98 too.):
Windows 95 boot disk image download
Windows 98 SE download page:
https://winworldpc.com/product/windows-98/98-second-edition
Grab the Windows 98 SE Retail disc here.
Once you have those downloaded somewhere convenient for you, you can use the little icons at the bottom of the emulator window to load them into the emulated drives.
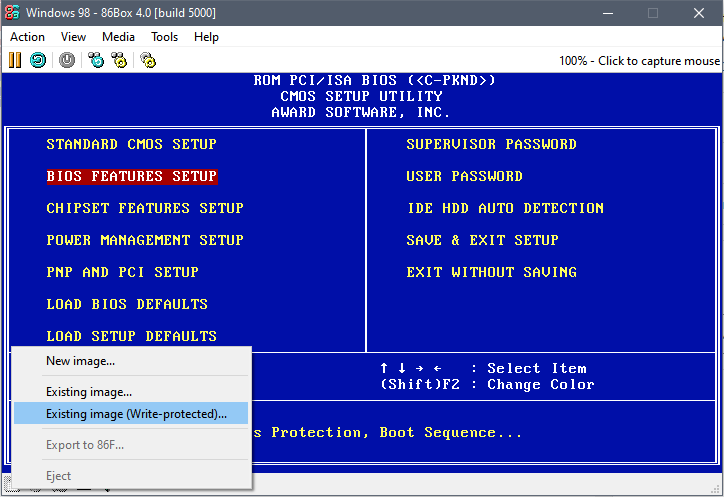
Load boot.img into the floppy disk drive and the Windows 98 SE (101 – Retail Full).iso into the CD-Drive.
Before we leave the BIOS, let’s change the boot order for the drives. Select BIOS FEATURES SETUP and hit enter.
Scroll down to boot sequence and press Page Down so the A, CDROM, C is selected.
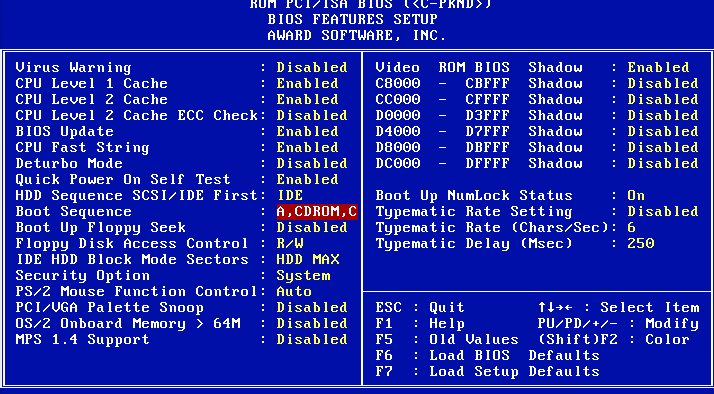
Hit escape to return to the main page.
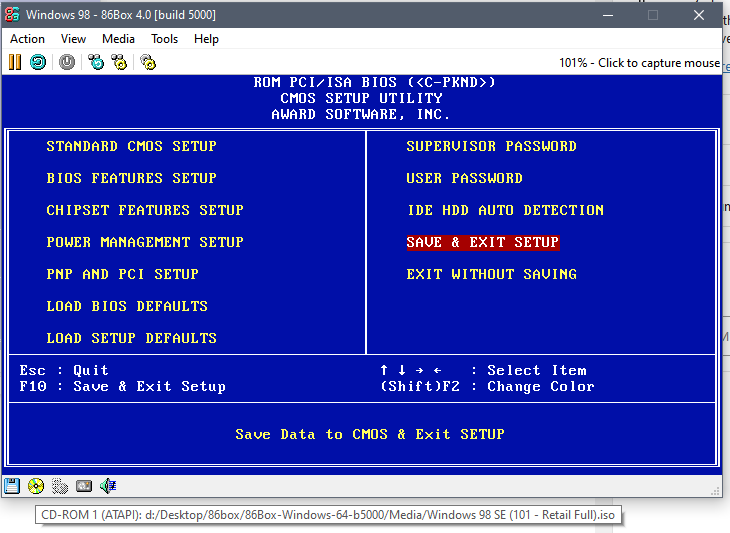
Now select SAVE & EXIT SETUP and press enter, then press Y to save and hit enter again.
The computer will now boot and load up from the floppy disk drive.

Installing Windows 98
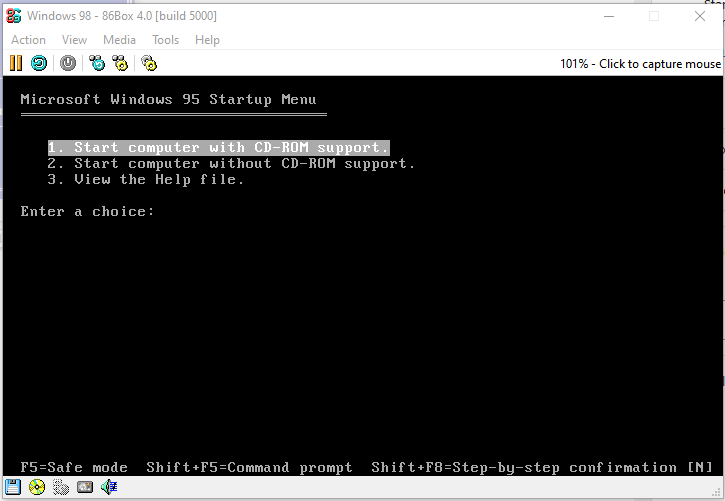
Hit enter to start computer with CD-ROM support.
Give it a minute to load up all the drivers.
Once you are at the A:\ DOS prompt, type:
fdisk
and hit enter to load up the partition manager.

Hit Y then enter to enable large disk support.

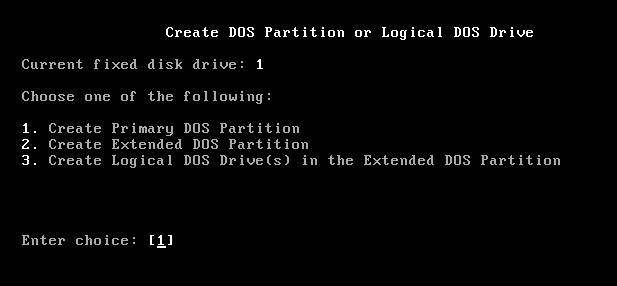
Then press 1 then enter, then 1 and enter again to create a primary DOS partition.
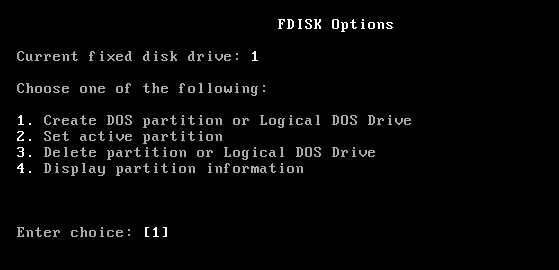
Then Y


Hit Escape to get dumped back to the DOS Prompt.
You can now press Ctrl + F12 to reboot the machine. Again let it boot up with CD-ROM support.
Now once back at the A:\ prompt type:
format c:
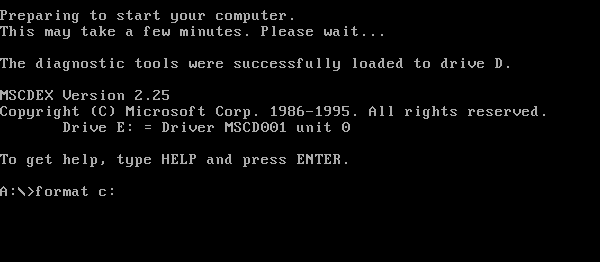
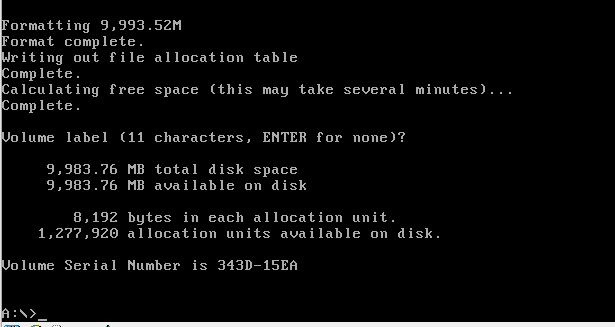
Hit Y and enter.

Give it a moment to format and give it a volume label if you want when it asks.

Now we can type
d:
to access the CD-Drive, then type:
setup
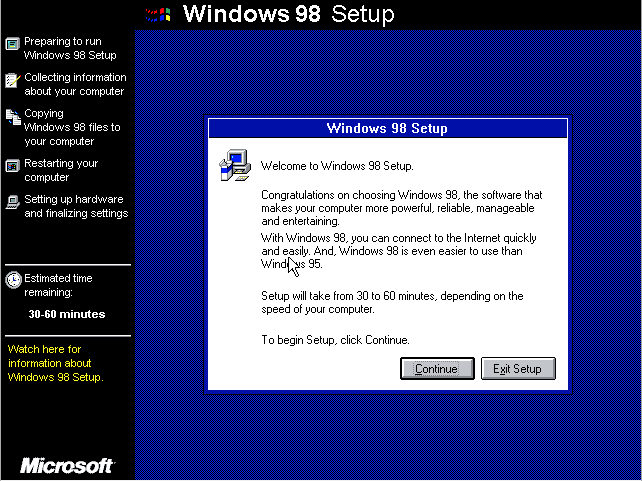
to load into the Windows 98 setup.

Hit enter and let it run through the scan then select exit and press enter.
Click continue at the prompt.
Select I accept the agreement and click next.
Enter a serial key. Use one of these:
K4HVD-Q9TJ9-6CRX9-C9G68-RQ2D3
PRDDH-83JD9-G6PK4-684GF-6Y73B
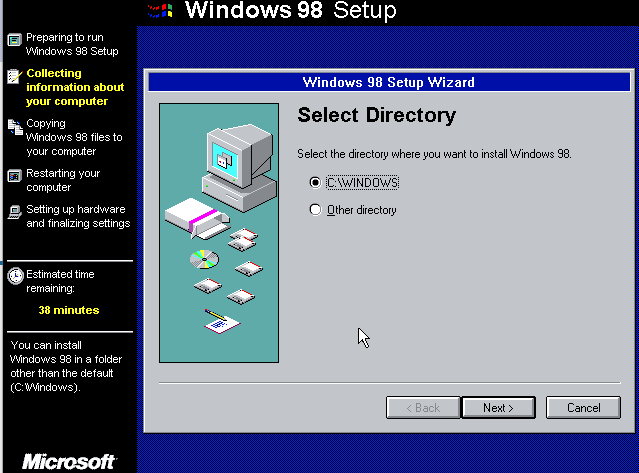
Use the default install directory and click next.
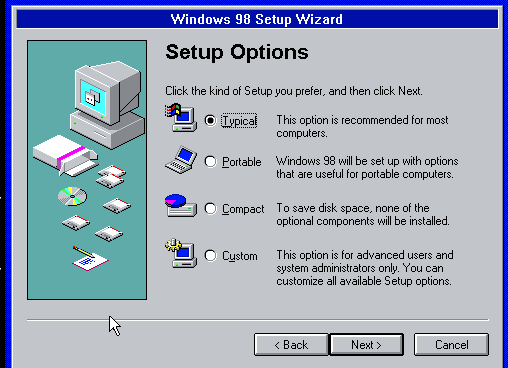
I recommend just going with the typical install, you can always install other features later on.
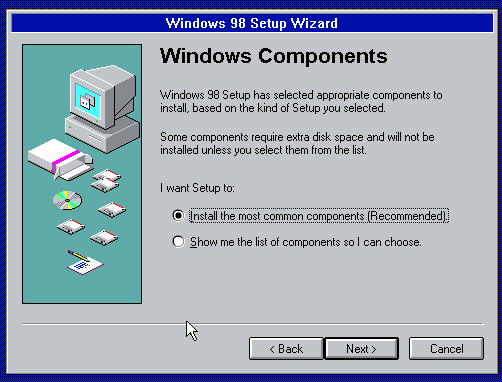
Enter a name and then just go with installing typical components.
Continue clicking next, tell it which country you’re in and then it will ask if you want to create a boot disk.
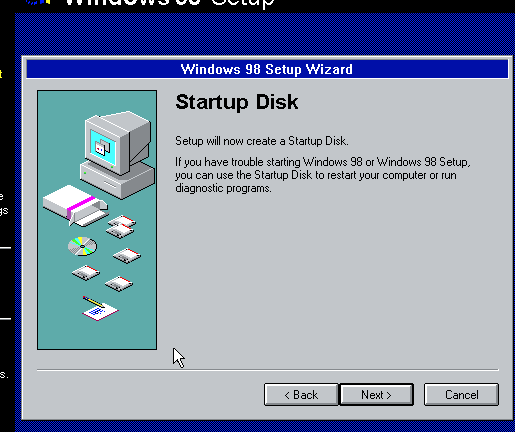
We don’t need one. Just click cancel when it asks you to insert a blank floppy.
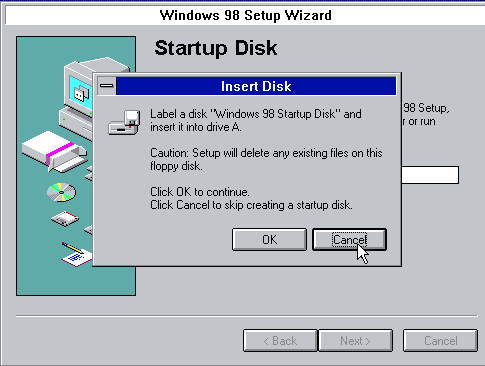
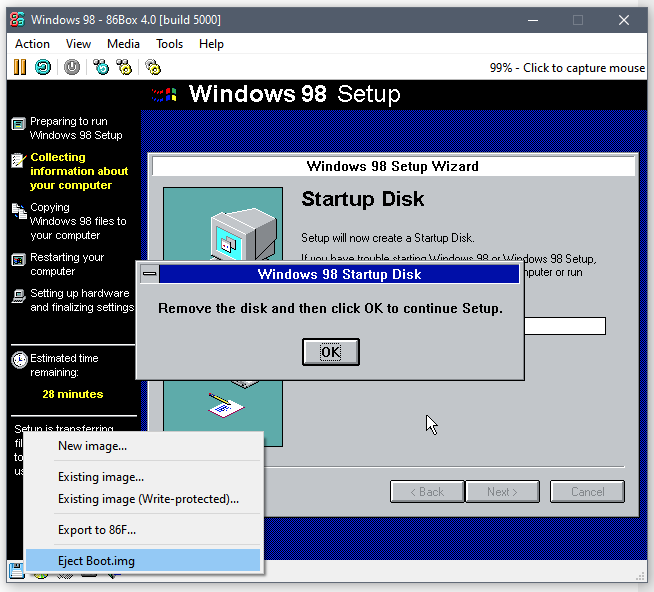
It will now ask you to remove the boot disk from the floppy drive.
Remember, you can click the middle mouse button on your mouse to uncapture your mouse from the emulator, now click the floppy disk icon and click eject.
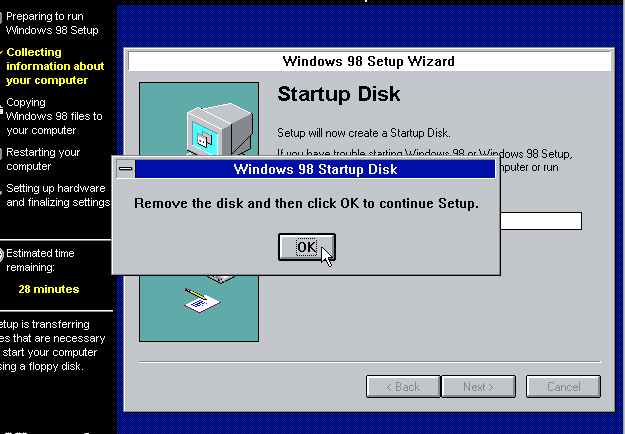
Now hit OK, then next.
The setup will now install the OS to the HDD.
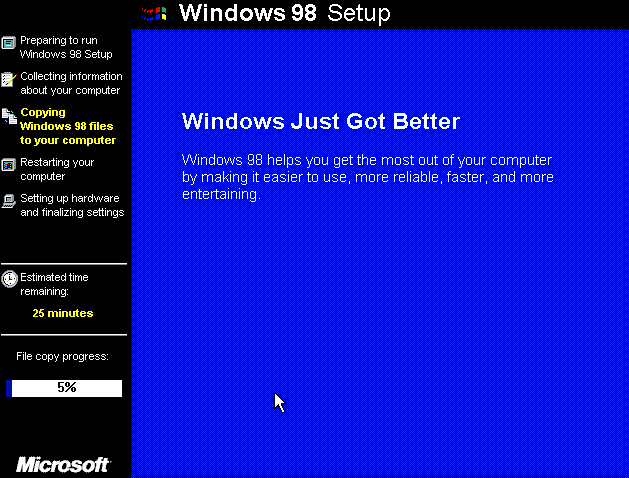
Did you know Windows just got better?
It will take a little while to install, let it do its thing, eventually it will ask you to set your time zone, once you’ve done that it will continue installing for a few more minutes.
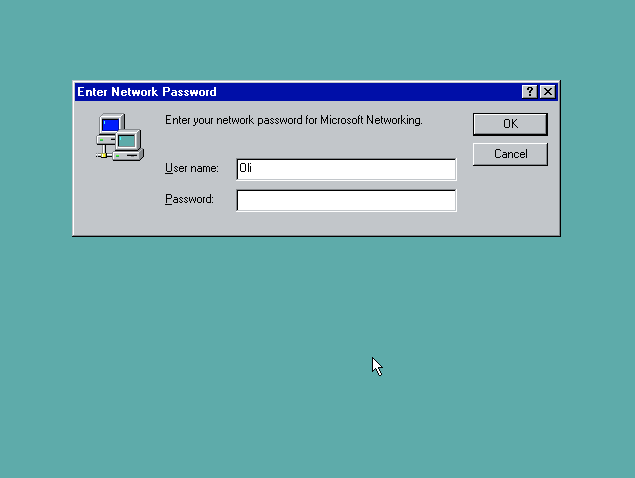
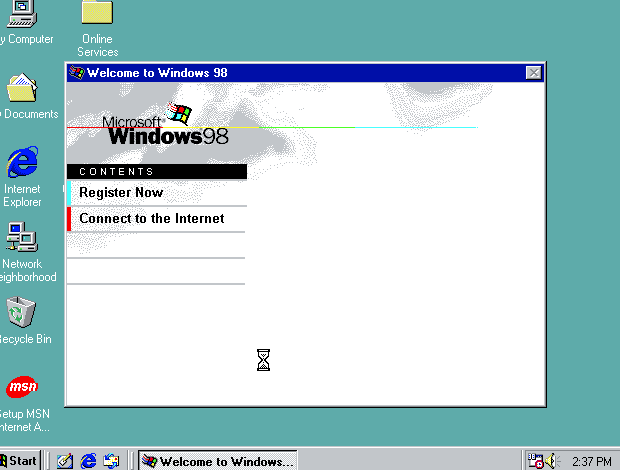
Eventually you’ll end up at the logon screen:
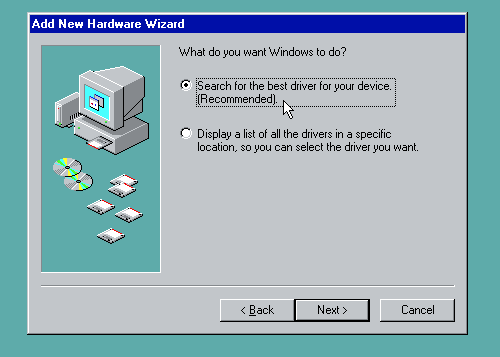
Click OK then next when it asks to search for things.

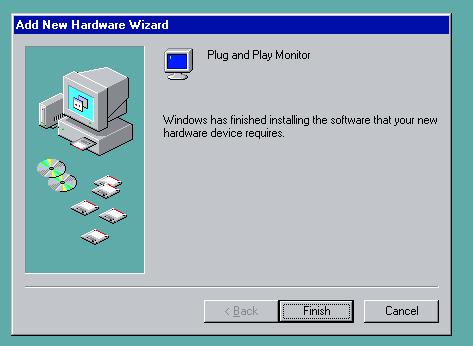
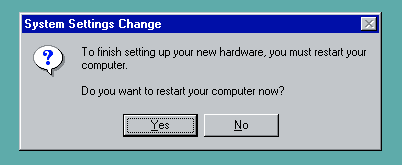
Restart and we are almost done.
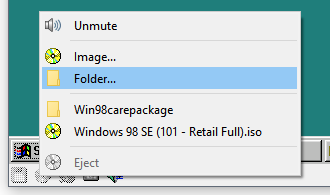
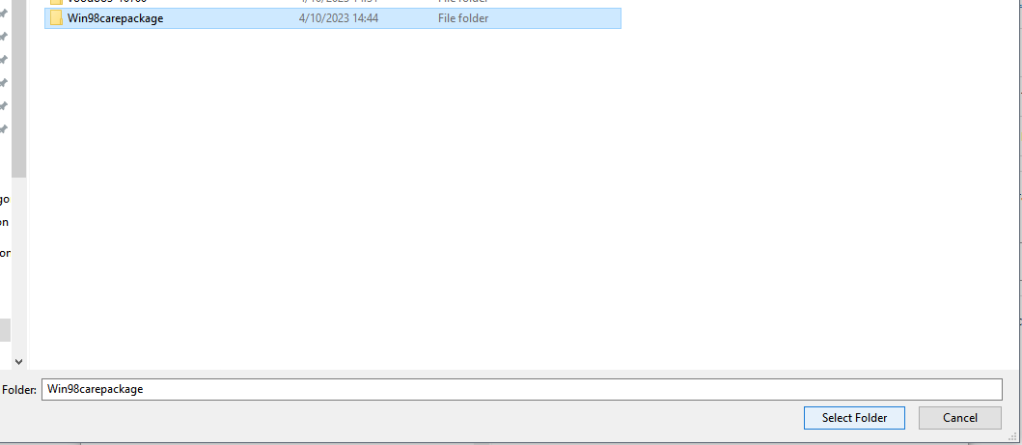
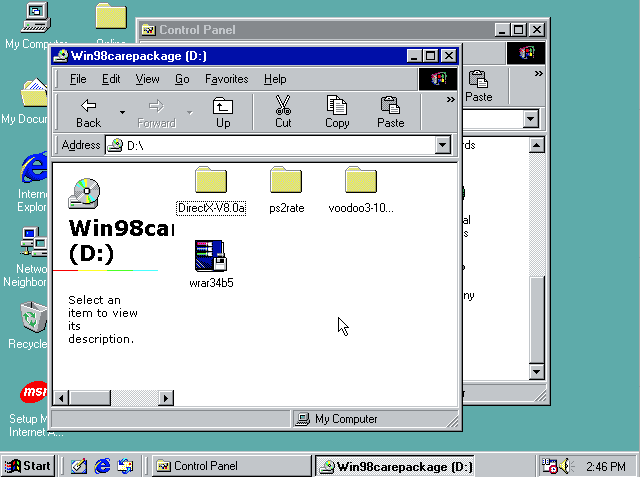
I’ve put together a little care package containing the drivers for the voodoo3, DirectX 8a, Winrar and a tool to increase the mouse polling rate so it’s a bit smoother.
A very convenient feature of 86box is the ability to load up folders on your host system as a virtual CD-ROM, making getting things into the emulated system very easy.
Unzip the care package and load it up as a CD.
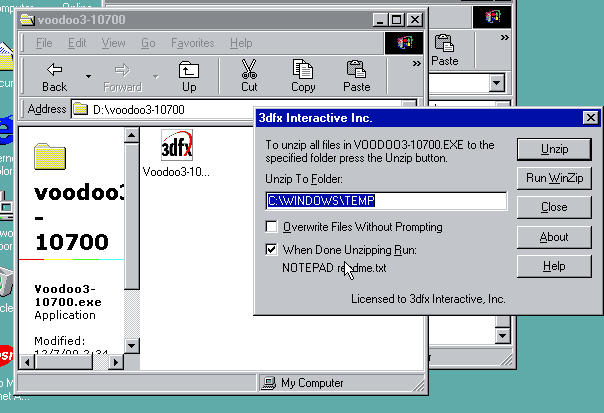
Run the voodoo3 self extractor.
Navigate to the location you extracted to and run “isetup”. Click restart once that appears.
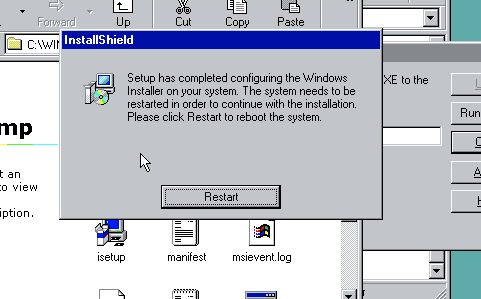
Once it reboots the setup wizard will take you through the install process and ask you to reboot again and that’s pretty much it.
I recommend you install Directx 8 now.

Finishing Up
You might have noticed as Windows boots up it’s very stuttery, this is because our virtual hard disk is still set to “RAM speed” in the emulator settings. Shut down the virtual computer and go back to the configuration menu and into the hard disks tab.
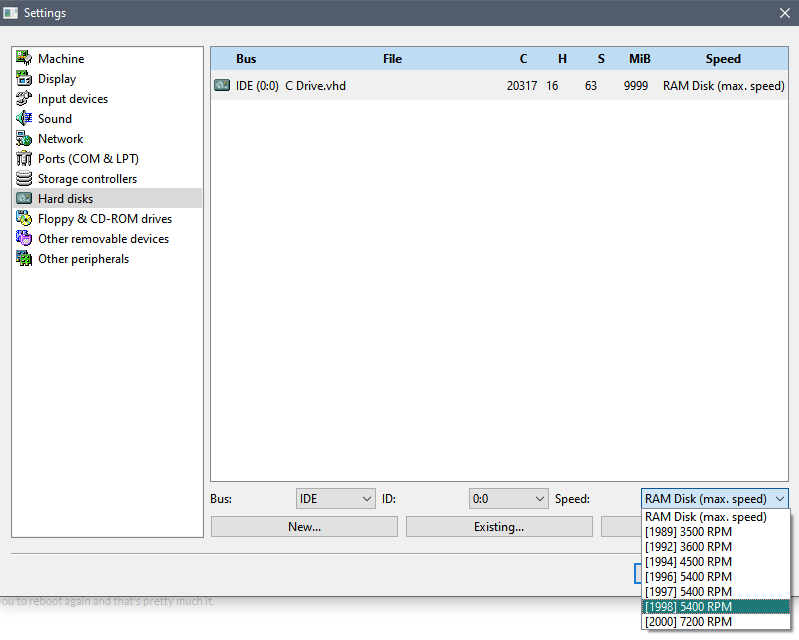
Change it to the more period accurate 1998 hard drive speed and now Windows should boot up at a more authentic speed.
You might also want to set 86box to a forced 4:3 aspect ratio when windowed.
There are also different rendering modes available. Software is the default and has the least latency, while the OpenGL and Vulkan renderers add a little bit of latency but tends to be a little smoother in terms of frame pacing. OpenGL 3.0 seems to work very well with dos games and as long as you have the right refresh rate can be very smooth, but the latency is probably at it’s highest in this mode. You’ll need to experiment to see what works best you. All these options are found under the view menu.
Side note: If you’re going to be playing DOS games, and you have a fixed refresh rate monitor, it’s worth seeing if it will run at 70hz. Many standard 60hz monitors can actually run in 70 and 75hz if you lower the resolution down to something like 1024×768. Many DOS games run at 70 so it’s worth experimenting with custom resolutions in your host machine’s display drivers.
The terribly optimized WordPress editor is starting to slow down so much under the weight of this lengthy guide so I think it’s best I end it here. I hope you’ve found this guide helpful and it wasn’t too confusing.

thank you SO MUCH FOR THIS!! i cant believe nobody else commented yet. so helpful. mines working the absolute nuts. really appreciate it. cheers
LikeLiked by 1 person